How To
In this section you can learn how to do anything in MOPSEUS. This section includes help, tutorials, tips and how-to guides for MOPSEUS.
Login to System
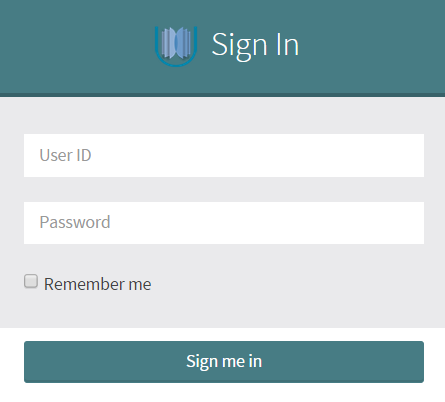
To be directed to the login page of the system, type [Your_Mopseus_URL] in your browser search bar. Every user has been given a name (UserID) and a respective code (Password), in order to provide a control mechanism for the operations performed within the system. You are able to select the "Remember me" option. By selecting this option, the browser will remember your credentials in the next session and therefore you will not have to type in your credentials again.
Important Note:Please use the option "Remember me" only to computers in which only you have access.
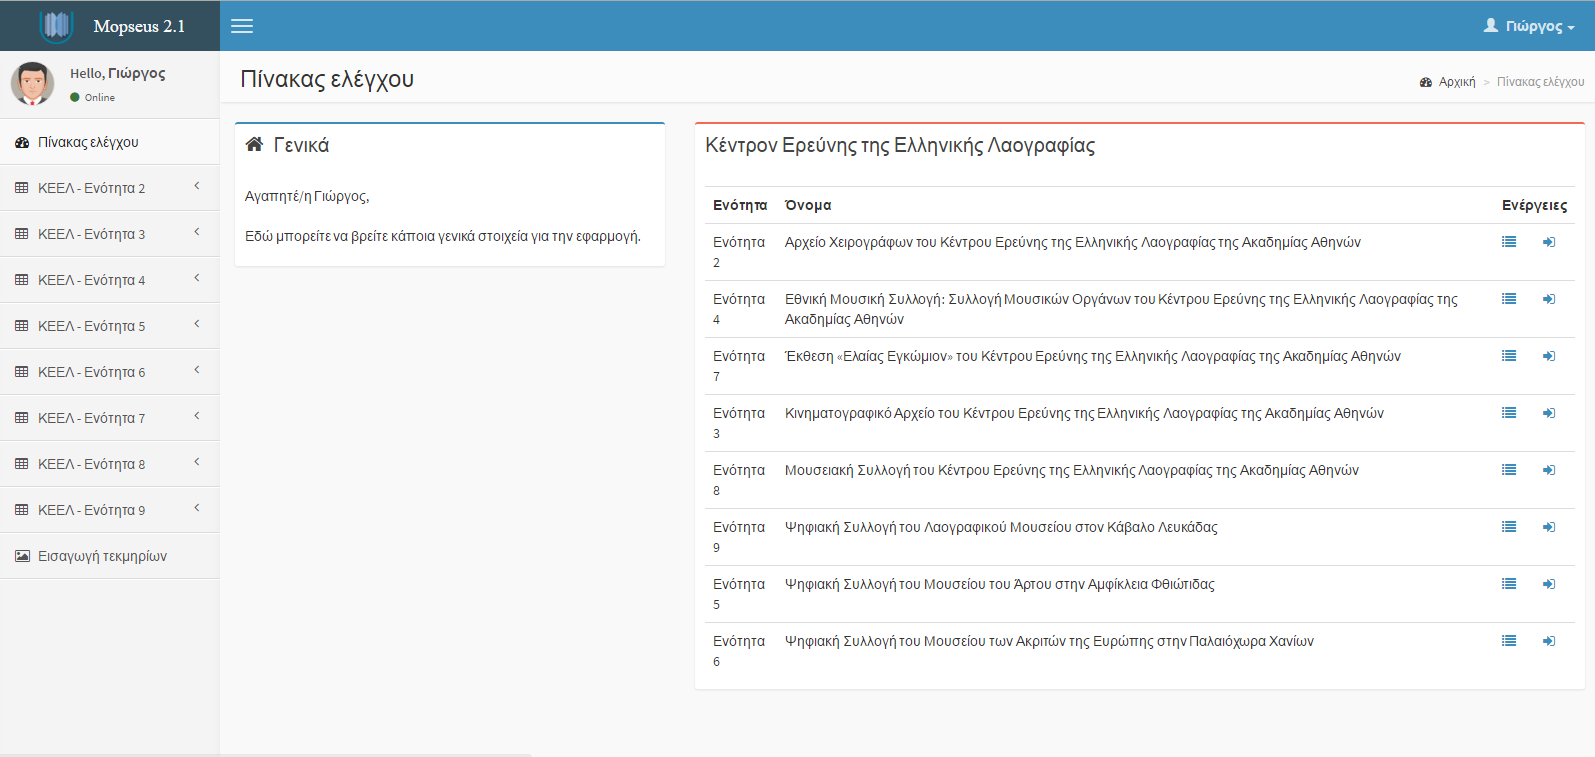
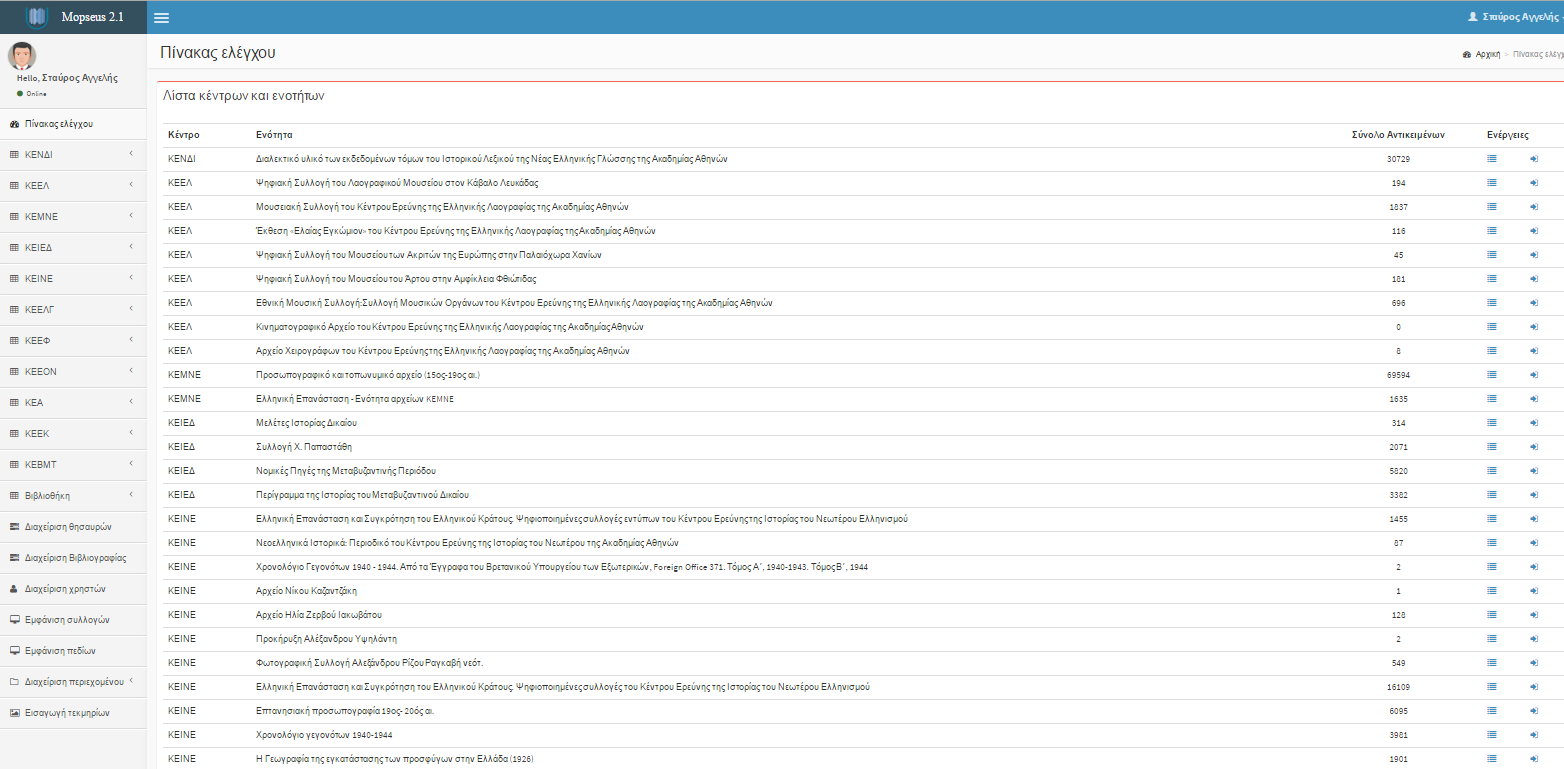
Once you have entered the system, you will be directed to the main page. The main page contains the Centers, with which you are linked, accompanied by their units as well as the items that have been documented in each unit. (the administrator has a different home page and features, see the section System Administrator at the end of this page). Furthermore, you can see the titles of each item per unit by clicking the icon and can add a new item by selecting .
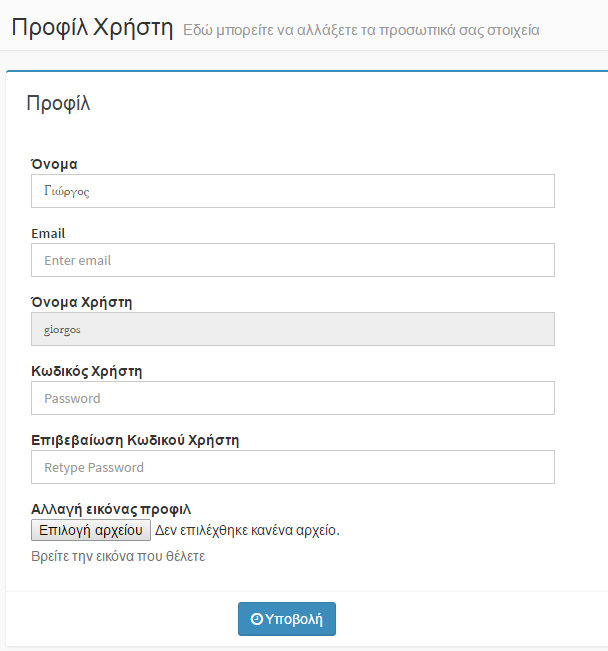
Edit Profile
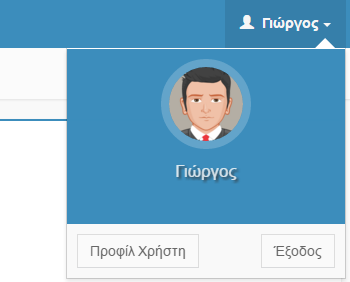
To edit your profile, click on your name on the top right of the screen. A pop up panel appears in which you must select "User's Profile" (select Sign out if you wish to do so).
Then, a form with your data appears on screen. Through this form you can process all the available features except the Username (only administrator can change it via "User Management"). Also, you can upload a new photo if you wish to change the current one.
Items
Import Images
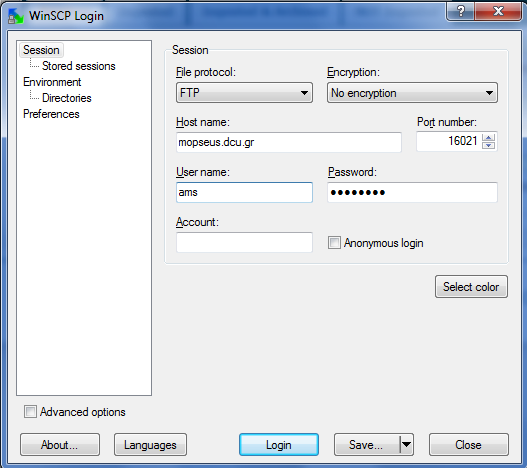
The insertion of the images is crucial, because it will give us the opportunity later on, to create items. To import images, you can upload them via SFTP / FTP using an application. Τhe WinSCP and Filezilla applications will be presented here as example of applications through which you can connect.
- WinSCP
You can download the application via the link winscp.net/eng/download.php. After a successful installation of the application (see instructions here), you must fill in the appropriate information (shown above) to connect.
-
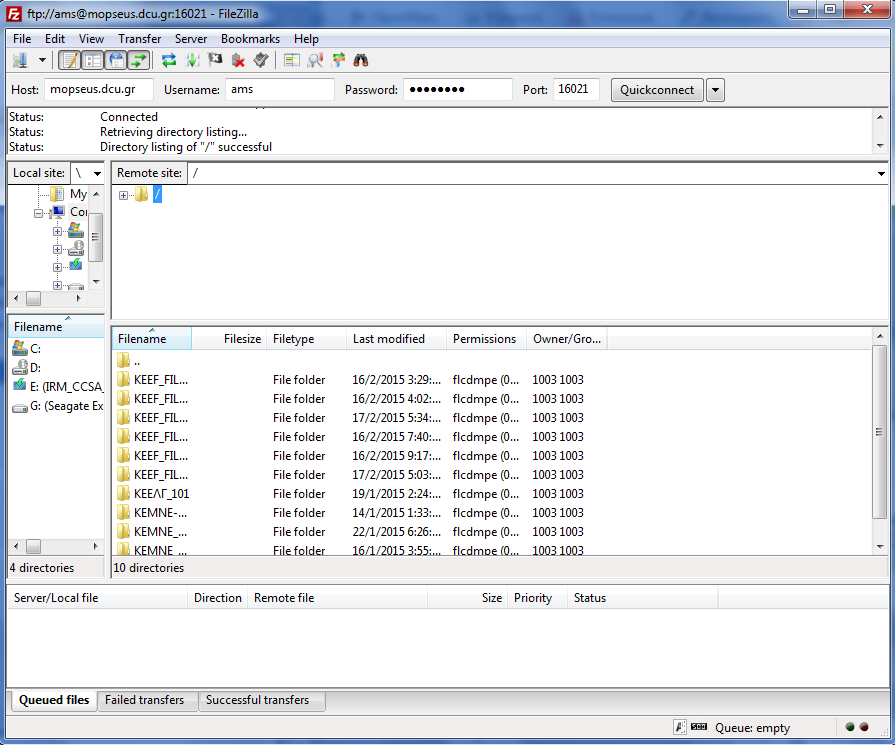
Filezilla
You can download the application via the link filezilla-project.org/. After a successful installation of the application (see instructions here), you must fill in the appropriate information (shown above) to connect.
Load Folder
Then you can see the new folder. Select from the menu on the left the "Import Document" tab and then select the "Scan" button. Through this way, you can check your computer for the folder in which the digital items are.
You can notice that the folder has not yet been uploaded and therefore the number of files is zero. Additionally, there is an option to "Upload" whereas in cases where the folder has been uploaded the available option is "Search" (rather than "Upload").

To upload the folder, select "Upload". After uploading the folder, you can see that the option "Upload" has been replaced by "Search". In addition to this, you may notice that now the number of files has changed.

Once you finish loading the folder, you can enter the folder and browse through the digital items it contains, via "Search".
Create Item
After selecting the Browse option, we will be directed to a new screen where the digital items are displayed in its main part. Moreover, in its left side a framework of actions is displayed based on which the start - stop and storage process of the new – to be created - items will start.
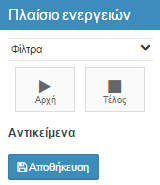
The image illustrates the main screen of the process. In this screen four digital items are presented per row (later on we will see how to manage/change the display environment on our own).
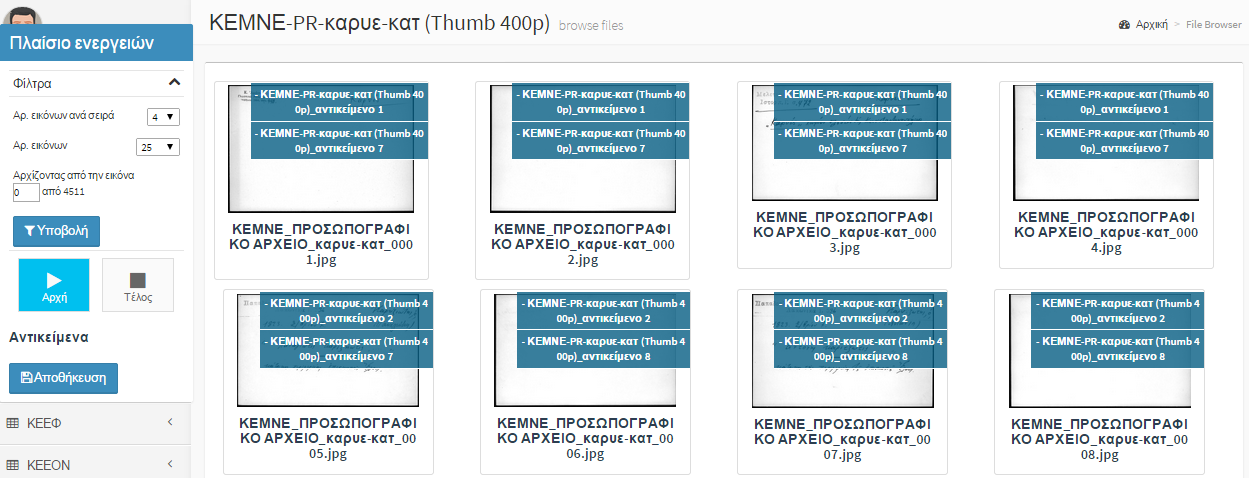
You are able to configure the work environment according to your particular needs. Through the framework of actions, you can choose the number of images you want to view per row (2-4 images) and the number of images per page (from 25-100). At the same time, in order to improve the browsing experience in the pages of the images, you are able to select the number of the image from which you want to start browsing. To see the additional options, you need to select "Filters". We should note at this point that the framework of actions can be moved to any part of the screen.
To initiate the creation process you have to press  and then you should select the items (images) that will compose the new item.
In the image below the user chose the first three images for the composition of the item that will be documented later. Once the selection is complete, the user has to choose
and then you should select the items (images) that will compose the new item.
In the image below the user chose the first three images for the composition of the item that will be documented later. Once the selection is complete, the user has to choose  .
Important Note: The selection is made by clicking each time on the item without using Ctrl.
.
Important Note: The selection is made by clicking each time on the item without using Ctrl.

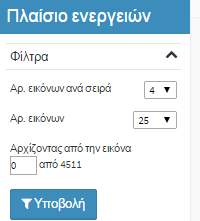
On the left side of the screen, in the framework of actions the new item appears, with the respective numbering, which can be saved by selecting Save. In the following picture, it is obvious that an item that has been created awaits its integration in a collection and in the unit of a Centre.

To complete the Saving process, you must select Save in order to be directed to the screen below. In that particular screen, you have to select the Center and the corresponding unit and then save again.
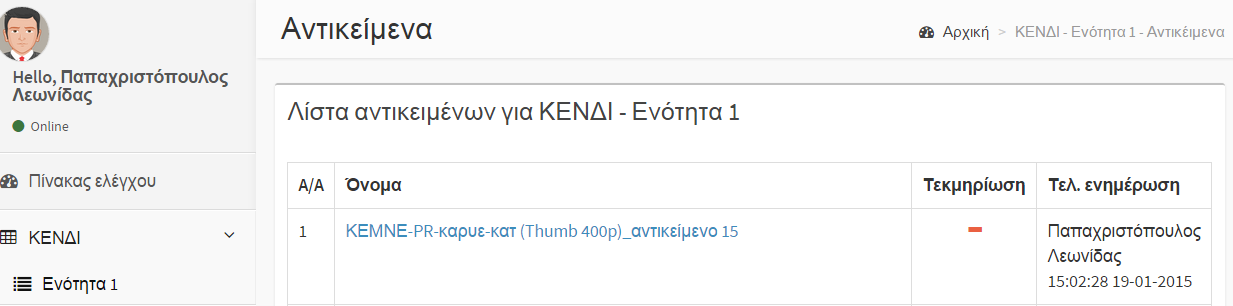
The item has now been created and integrated into the set of items of the Center and the unit, which are awaiting documentation, as its state indicates .
However, despite the abovementioned way of creating an item, there is also a second way. Specifically, you can create an item without first selecting the images that compose it. In the case of cataloguers:
- from the menu on the left select the unit of interest and then select "New Item".
- from the menu on the left select the unit of interest and then select "All Items". In the new page (which presents the items of the corresponding unit), go to the bottom and select "New Item".
- from the main page, select next to the desired unit.
In the case of administrator:
- from the menu on the left expand the desired Center, and then select the unit of interest. Then go to the bottom and select "New Item".
- from the main page, select next to the desired unit
We can see how we can create and then save an item without image.
Display Items
In case you are a cataloguer, there are the following two ways to view all the items of a unit:
- From the main page, in the panel of the Centre and its units, choose next to the desired unit.
- From the menu on the left expand the unit of interest and then select "All Items".
In case you are an administrator, there are the following two ways to view all the items of a unit:
- From the main page, choose next to the desired unit.
- From the left menu, expand the Centre of interest and then select the desired unit.
For each item, an indicator indicating if the documentation is complete () or not () is shown. Moreover, you can see when and by whom the items were documented.
 Browsing
You can use the search bar to find quickly the item you are looking for. All you have to do is type in, the title of the article or part thereof. Moreover, you can select to view items per documentarist. Select the appropriate documentarist from the dropdown list.
It is worth noting that is possible to classify the items, with 5 different ways:
- Ascending numerical classification
- Descending numerical classification
- Ascending alphabetical classification
- Descending alphabetical classification
- Based on the documentation status
To print, select . You have the freedom to choose from which item you want to start printing and how many items to include. Moreover, you can use a filter in one of the available fields. After you have fill in the appropriate fields, choose "Print" to start the printing process.

Documents
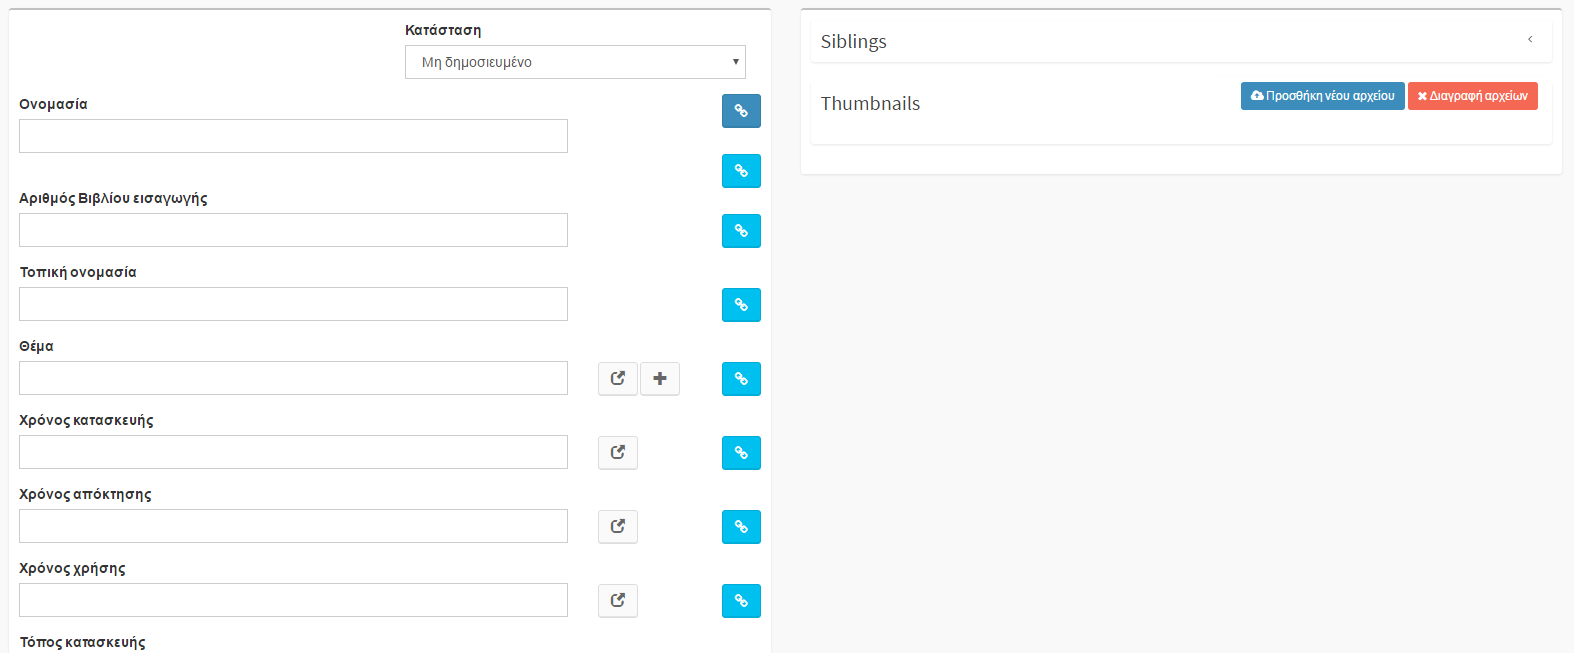
Item Documentation
When we want to document a new item, we select the icon from the control panel and that will lead us to the list of existing items, where we should choose a non-documented item (). Then, when the respective item is displayed, we need to fill as many of the available fields. In the image below, all the fields that we have to fill according to the documentation guidelines are shown (different Centers can have different fields to be filled).

Documentation
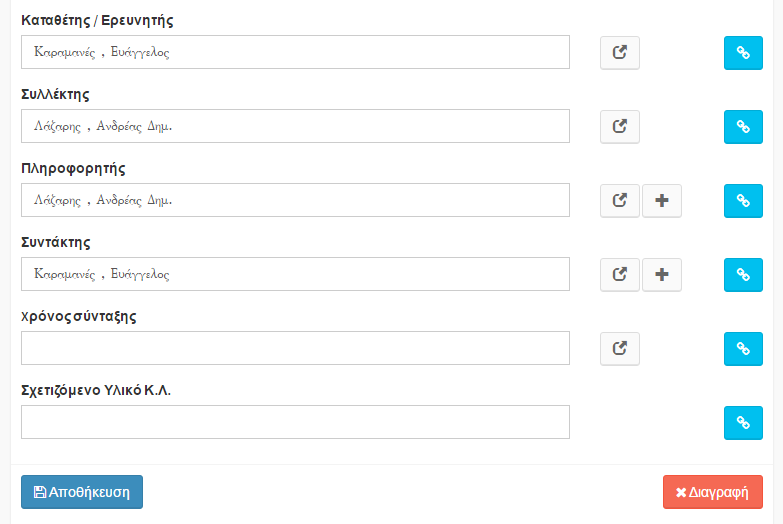
The icon  after each field is used to open a frame of subfields. You can choose between the options of already registered or of adding a new on on your own, which will be displayed in future registrations.
The process ends with press of the "Save" option. Similarly, you can delete an option in your list by selecting it and pressing the "Delete" button.
after each field is used to open a frame of subfields. You can choose between the options of already registered or of adding a new on on your own, which will be displayed in future registrations.
The process ends with press of the "Save" option. Similarly, you can delete an option in your list by selecting it and pressing the "Delete" button.
At the same time you may have noticed the icon . Using this icon, you can create a second field adding new information.

By selecting , a new field equivalent to the first is created. By selecting again the same icon you will create new fields. On the other end of the spectrum, we can delete any of the fields by choosing .

Import information through
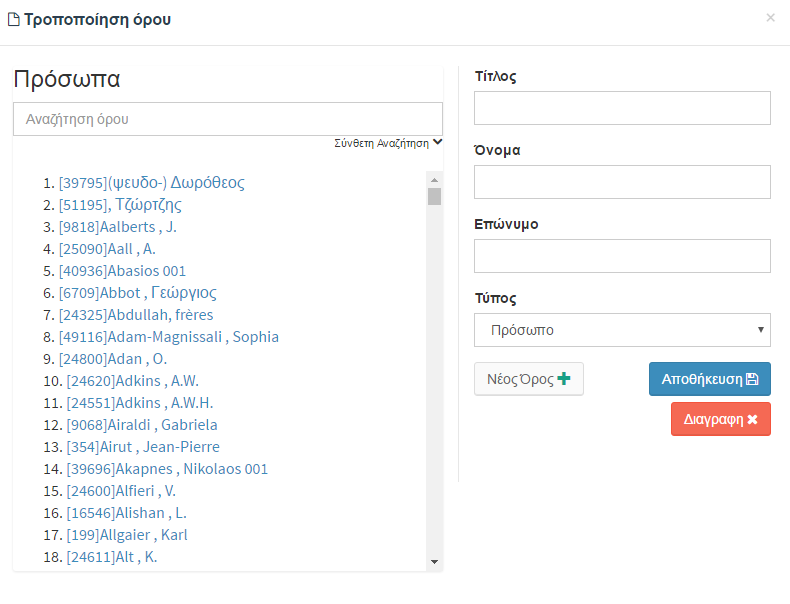
Import Person
Regarding the Import of persons, the user comes in contact with the following dialog box, in which he/she can insert the corresponding information. The existing information can either be selected from the left or be added from the fields.
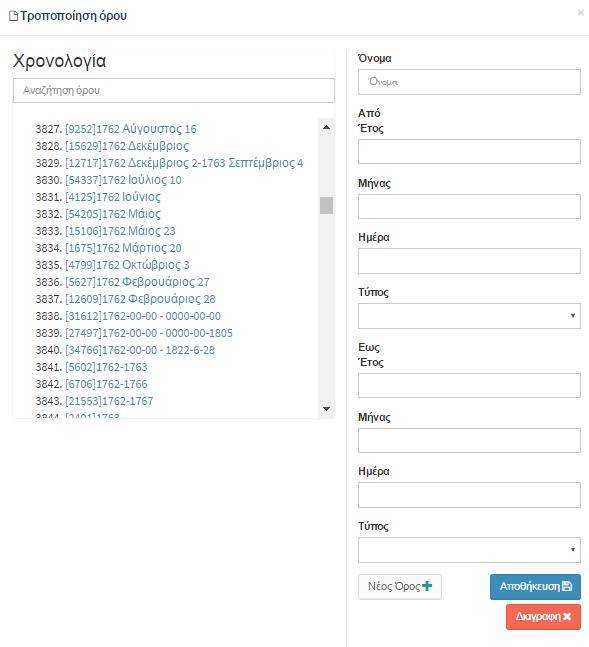
Import Date
The insertion of data associated with time is similarly done. The particularity of the field is to add a time event in a broader term. In this context we can set the duration of an event and also to define its type (BC, AD).
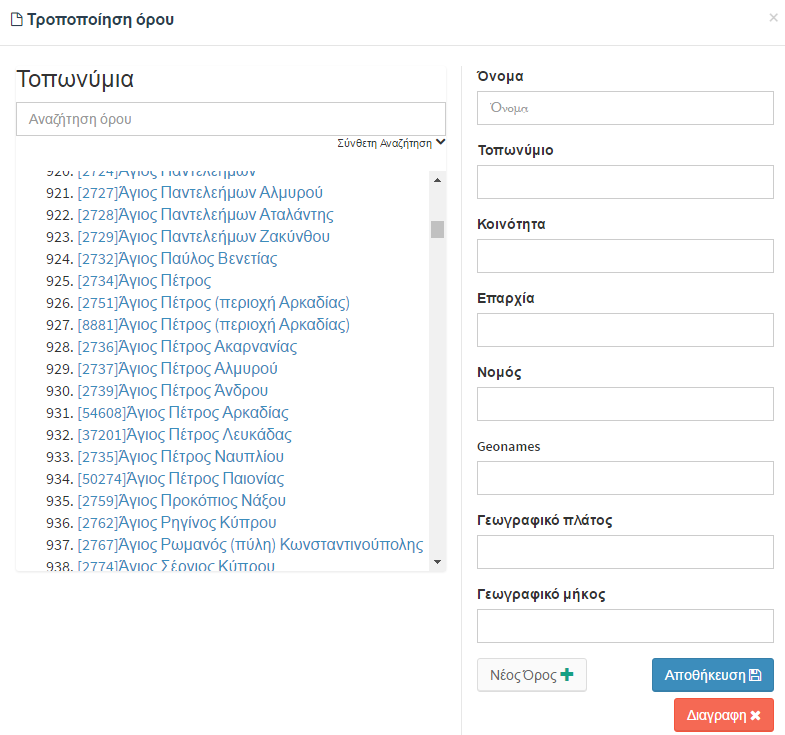
Import Place Name
The input box used for inserting information associated with place names follows the above mentioned process.
Import Subject
Similarly, the subject field introduces a subject integrating it or not under a broader term. On the left side of the frame we can see the hierarchies of subjects that we have created but also the remaining available subjects.
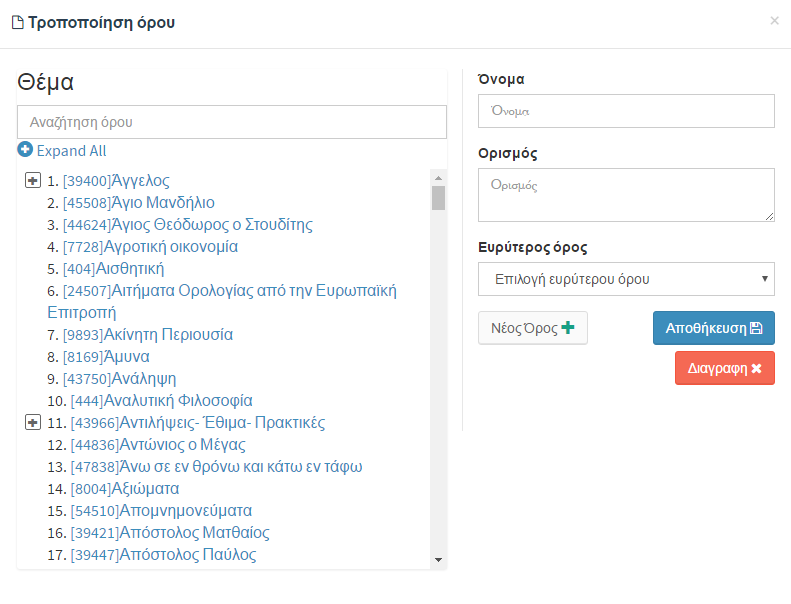
In each of these cases, when we want to create our own term the steps are following:
- Select "New Term "
- Fill in the necessary fileds
- Save the new term by clicking on "Save"
Also through the search bar, we can do a specific term search. Simply we type the term or a part of it.
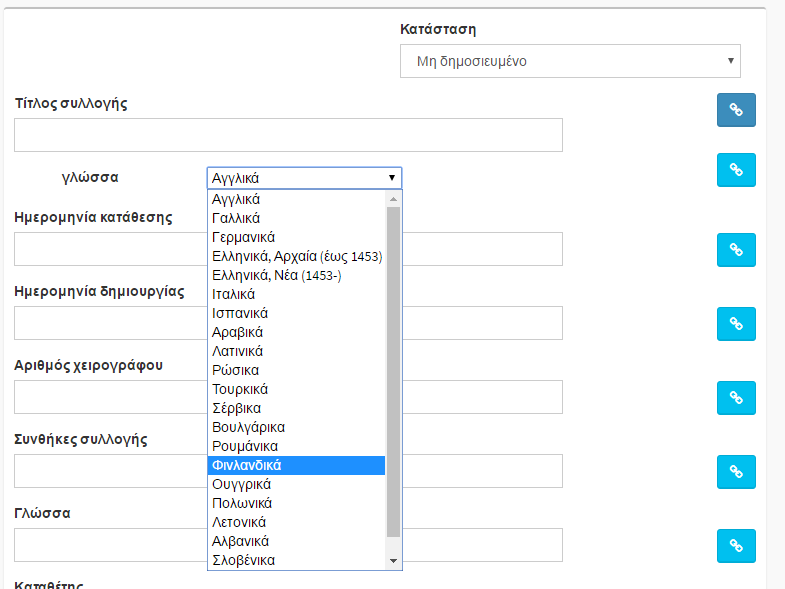
Import Language
Regarding the Import of language, select the appropriate language from a drop-down list.
Edit / Modify a Document
We can change the state of an item by choosing "Published" or "Unpublished" from the dropdown list. This change affects what the user of portal can see.

Moreover, it is possible to modify any other field. To save the changes you must select the "Save" button, located at the end of the page (as shown in the figure below). Finally, the deletion of the item choose "Delete" (irreversible operation).
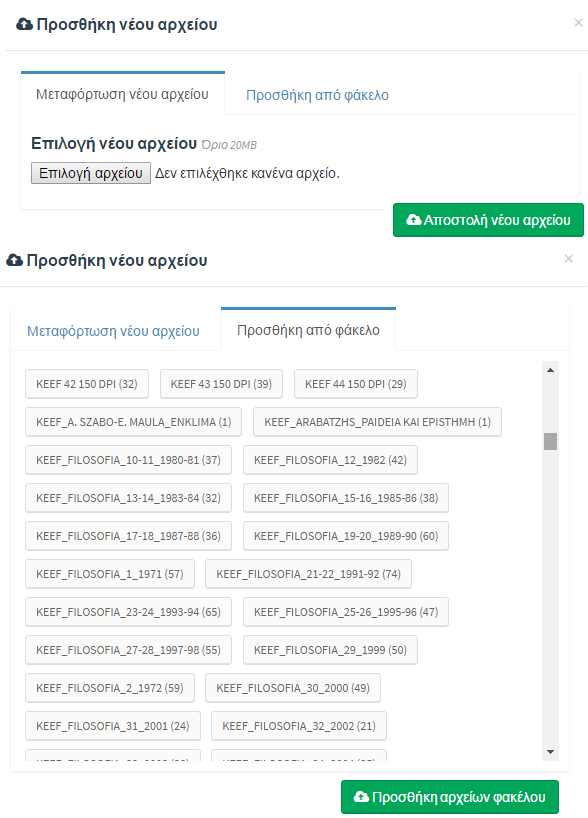
Additionally, we can upload new files or we can choose from any of the folders that have been imported into the system. From thumbnails panel select " Add new File". In this way, the new file will be placed in the file or a new folder with the new image will be created.
Example of a complete Item
In the following figure we can see an example of a complete record. The fact that some fields are still empty does not necessarily signify the lack of quality of the record. However, it demonstrates the inability to complete due to the lack of information.
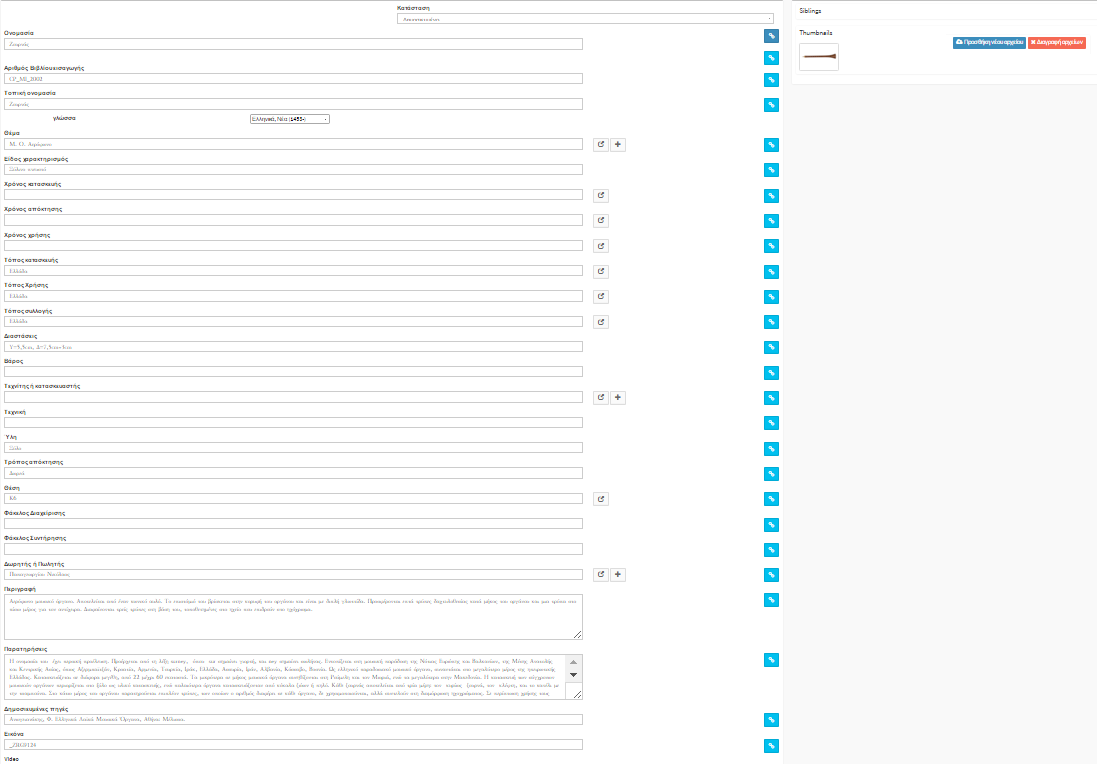
Click on the image, to zoom in.
Important note: Depending on the item, the available images may vary from none to few hundred. For example, a book can have hundreds of photographs because of many of the pages (each page and a new photo). On the other hand, for a material item such as a knife, less images could be used.
Semantic Documentation
The documentarist, apart from the documentation of an item, has also the ability to make a semantic documentation of the item. By saying semantic documentation we refer to the interconnection of an item or part of an item with a class of an ontology. The ontology used in the MOPSEUS case is based on the core classes of CIDOC-CRM model. Through semantic documentation, the user can view / manage an ontology as a whole and the related instances of this class. Through viewing, the user can navigate through the data of an ontology while managing includes adding elements or instances of the class as well as modification of an ontology.
The linking of a class with an ontology can be done by:
-
a document. For example, the document "Agiotheodoritis, Ioasaf" can be linked to any class of the ontology, identifying an instance for each one of these. The user can scroll to see all the classes of an ontology and respectively the instances he/she has to add, and select the appropriate
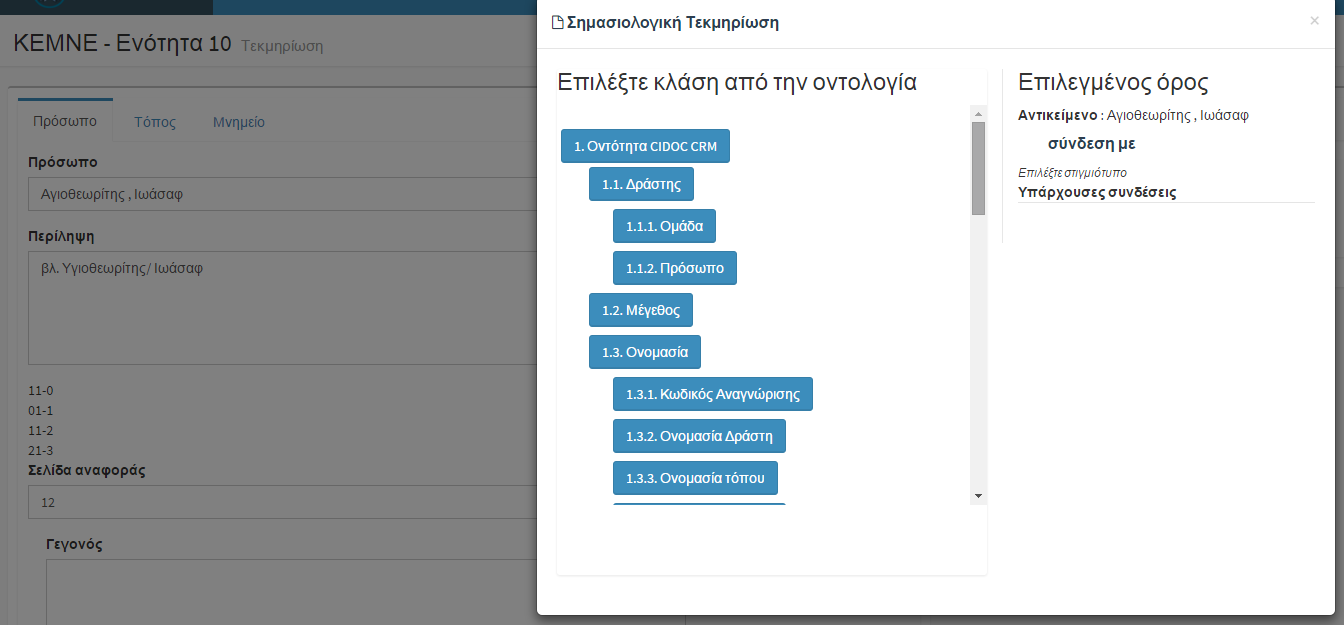
-
a part of an item. For instance, the term "Event" from the item "Agiotheoritis, Ioasaf" can be linked to the class 'event' of the ontology. Therefore, by selecting the icon
 from the term Event, a list of all classes is displayed and the user searches for the class Event to make the connection.
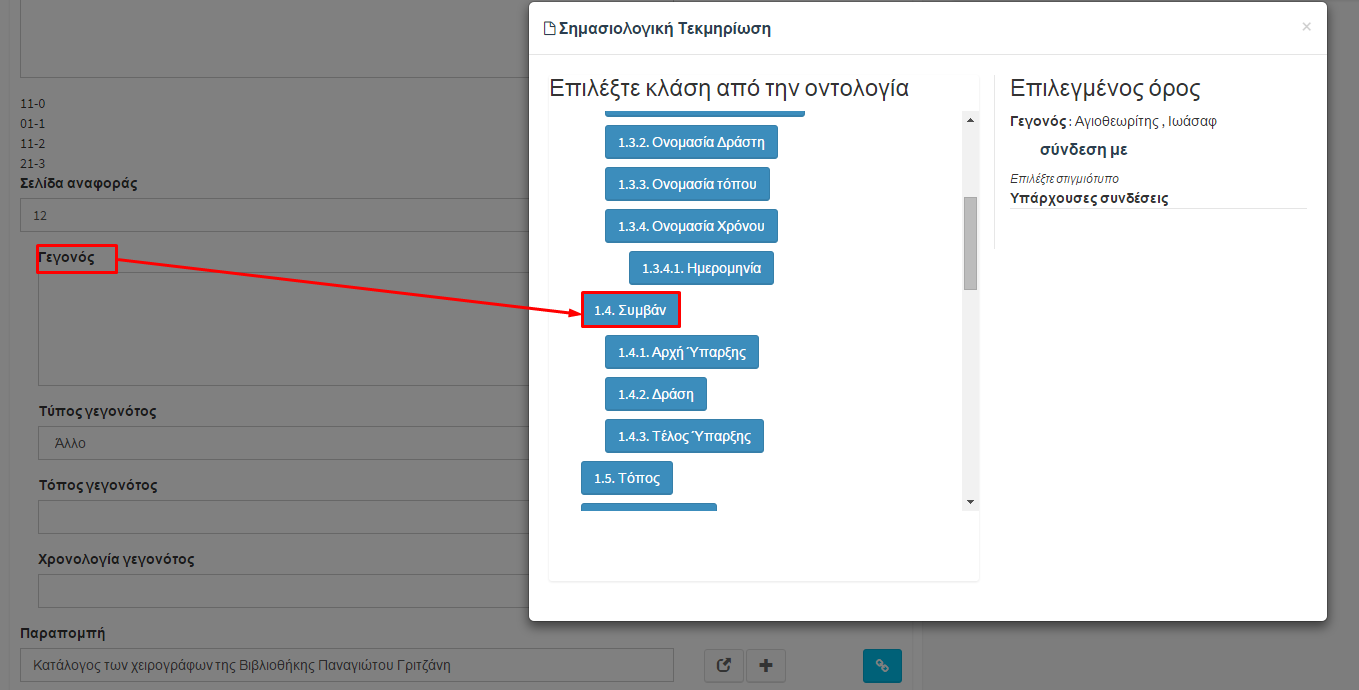 Subsequently, the users are given the ability to create instances and link them with an item. Choosing one of the classes of the ontology, the documentarist can add an instance of the class and link this particular instance to this item. For example, the documentarist of "Agiotheoritis, Ioasaf” document links the term event with the Event "Signatories of the Metropolitan of Varna Chrysanthou in patriarchal encyclical."

System Administrator
If your have administrator privileges, then after login into the system, the following screen will appear. We can easily distinguish the differences between the home screen of a cataloguer and an administrator. The administrator has access to all Centers and their units. Furthermore, the administrator has a few additional features which appear in the menu on the left.
User Management
Through user management, the administrator can add or delete users as well as process their data. Choosing the "User Management" from the menu on the left, a list of all users is displayed.
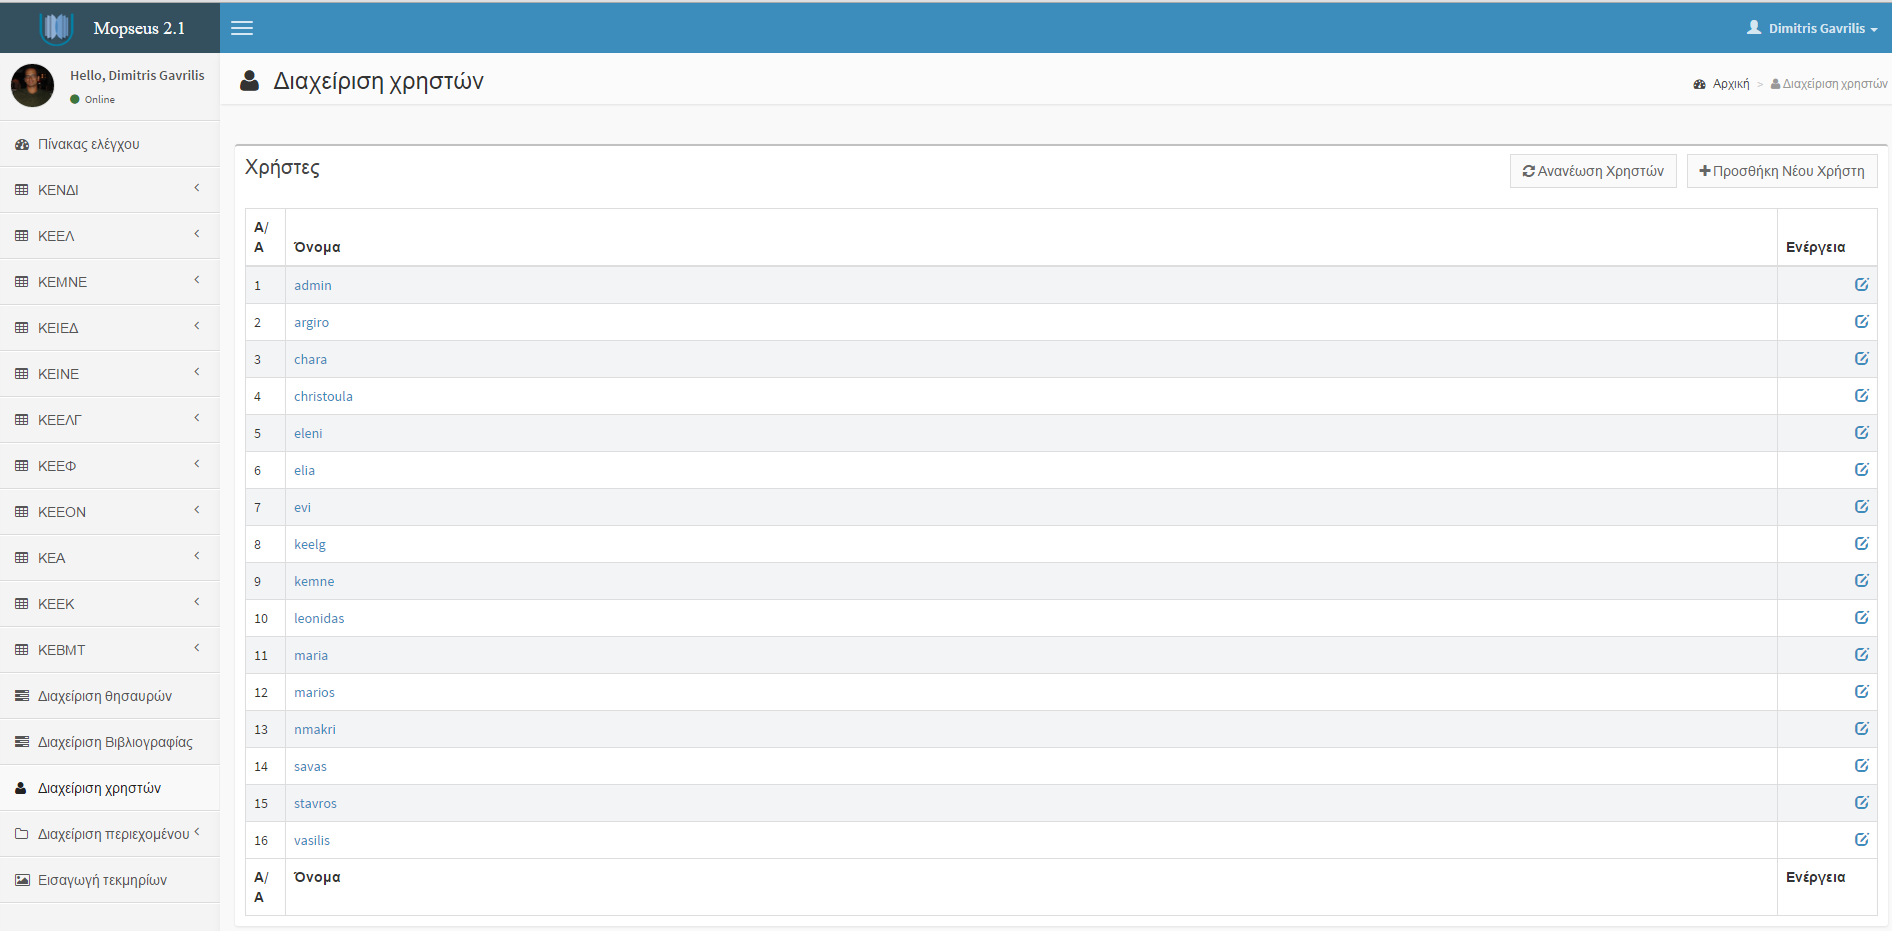
Selecting a user by clicking on the name or by clicking on the icon , the administrator can see the details. If the administrator wants to add a new user, he/she must select the "Window New User" button. The data he/she needs to fill in, are shown in the image below.
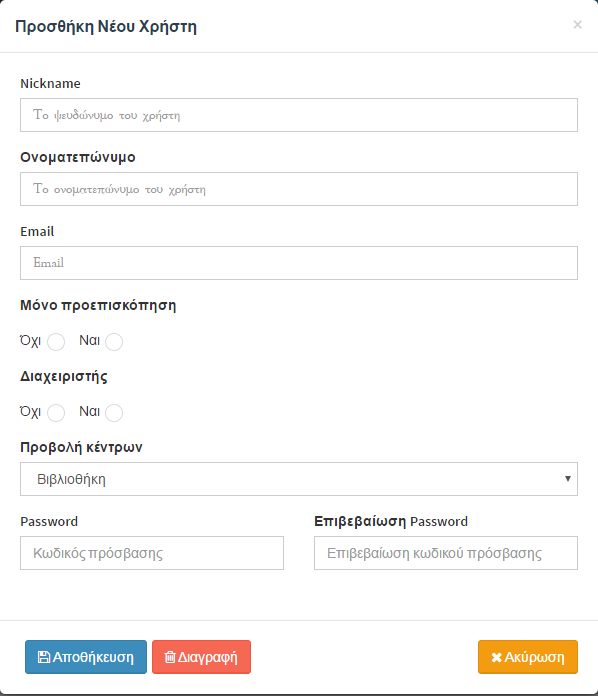
It is worth pointing out that the admin should be particularly careful in the following points:
- If the user has editing rights on documents or if he/she only has access to their preview.
- If the new user was assigned administrator privileges or not.
- If the user sees all the centers or only a specific center.
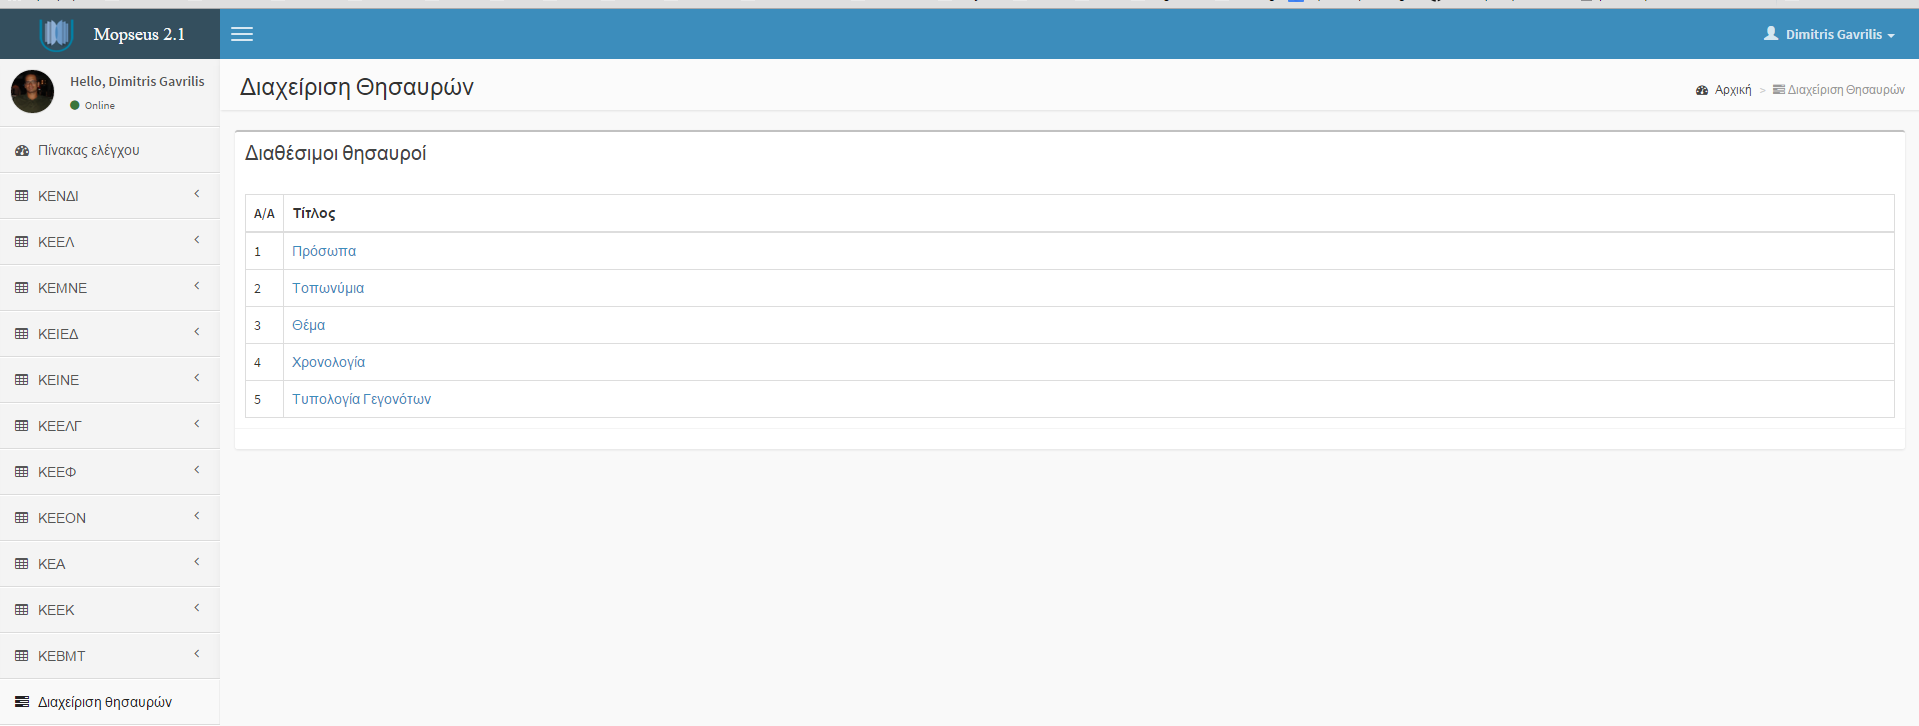
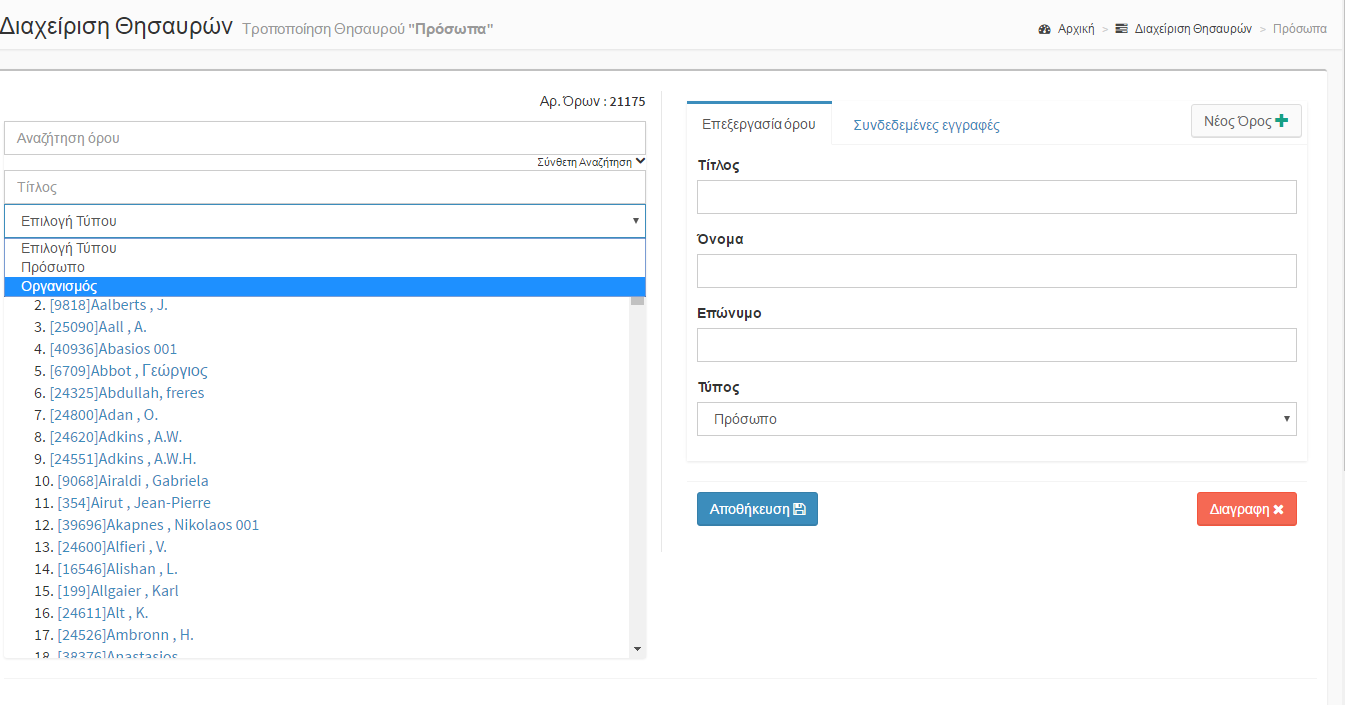
Thesauri Management
An additional capability that is provided to the administrator is managing thesauri. During the documentation of the project material, thesauri for the following categories were registered:
- Person
- Place name
- Subject
- Date
The administrator can edit any of the existing terms of a thesaurus or add a new one. Additionally, there is the ability to browse through linked records with a specific term. This kind of browsing shows in which Center a specific record belongs to while the administrator is able to delete the link between a term and a record.
For each one of the above categories, the respective term is described with some specific metadata. This metadata is:
- For the thesaurus of Person, metadata describing each term is the title of the person (e.g. professor, assistant professor, lecturer, etc.), name and surname as well as the type, namely if it is a person or an organization. By changing a value in any of the fields and saving it, the term will acquire these new values.
- For the thesaurus of Place Names, metadata describing each term is the name of the corresponding place, the name of the village, the community, the province, the county, the identifier of the Geonames database, the latitude and longitude of a place name.
- For the thesaurus of Subject, metadata describing each term is the name of the subject, its definition as well as its broader term, if exists.
- For the thesaurus of Date, metadata describing each term is the name of the date, the exact start - end date (year - month -day) of the period described.
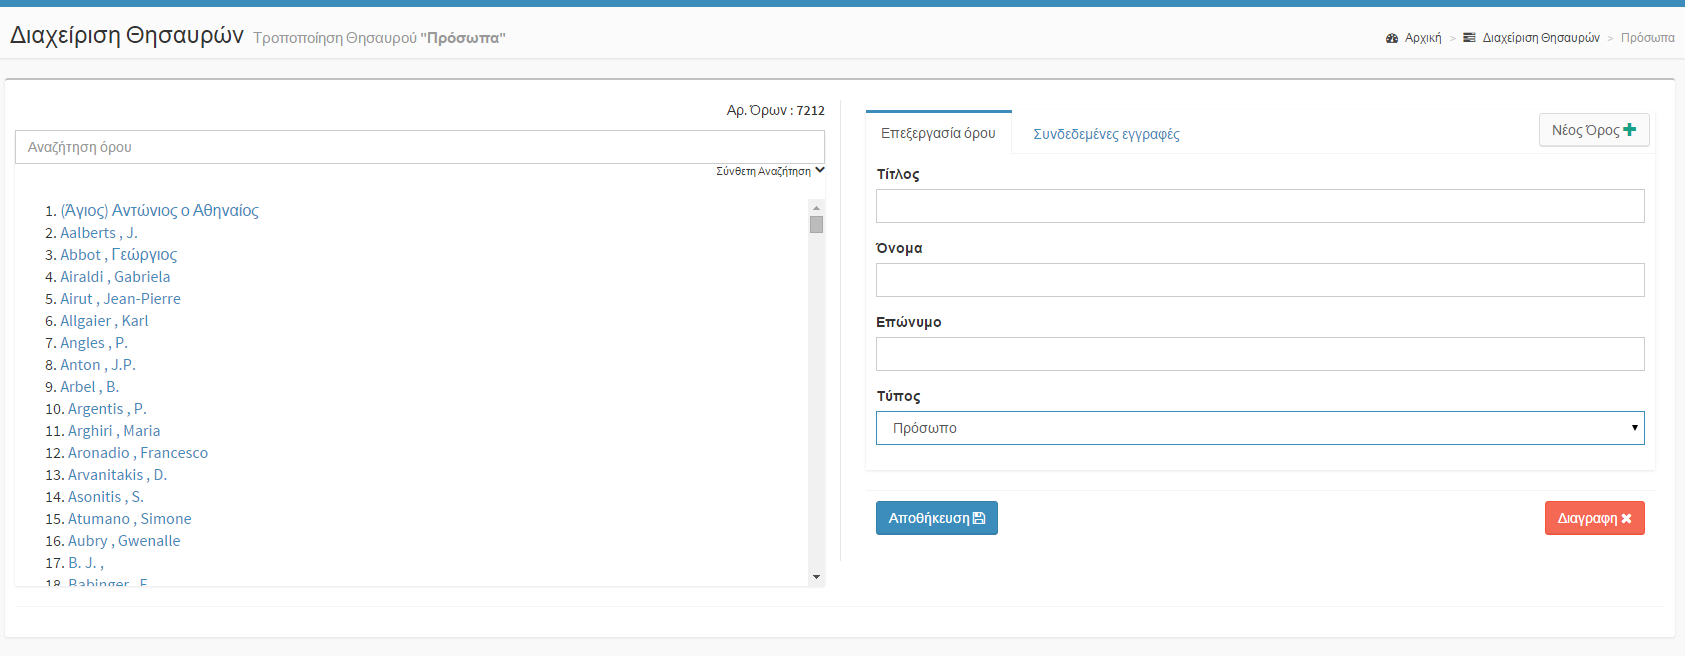
In each one of these cases, when we want to create a term on our own the steps are the following:
- Select "New Term "
- Fill in the necessary fileds
- Save the new term by clicking on "Save"
Very important is the Records Transfer feature, which allows us to transfer the records that have been linked with a term to another term. This function serves us where for example we enter a person more than once in the Person Thesauri and we want to link the records only with one of those two. In this manner, a term may be linked with a term, deleting the redundant terms.

Also, a very important feature is that of search. Using either the simple search (eg searching for a specific value) or the advanced search if you want to use an additional filter (eg if the treasure of people only want their organizations).
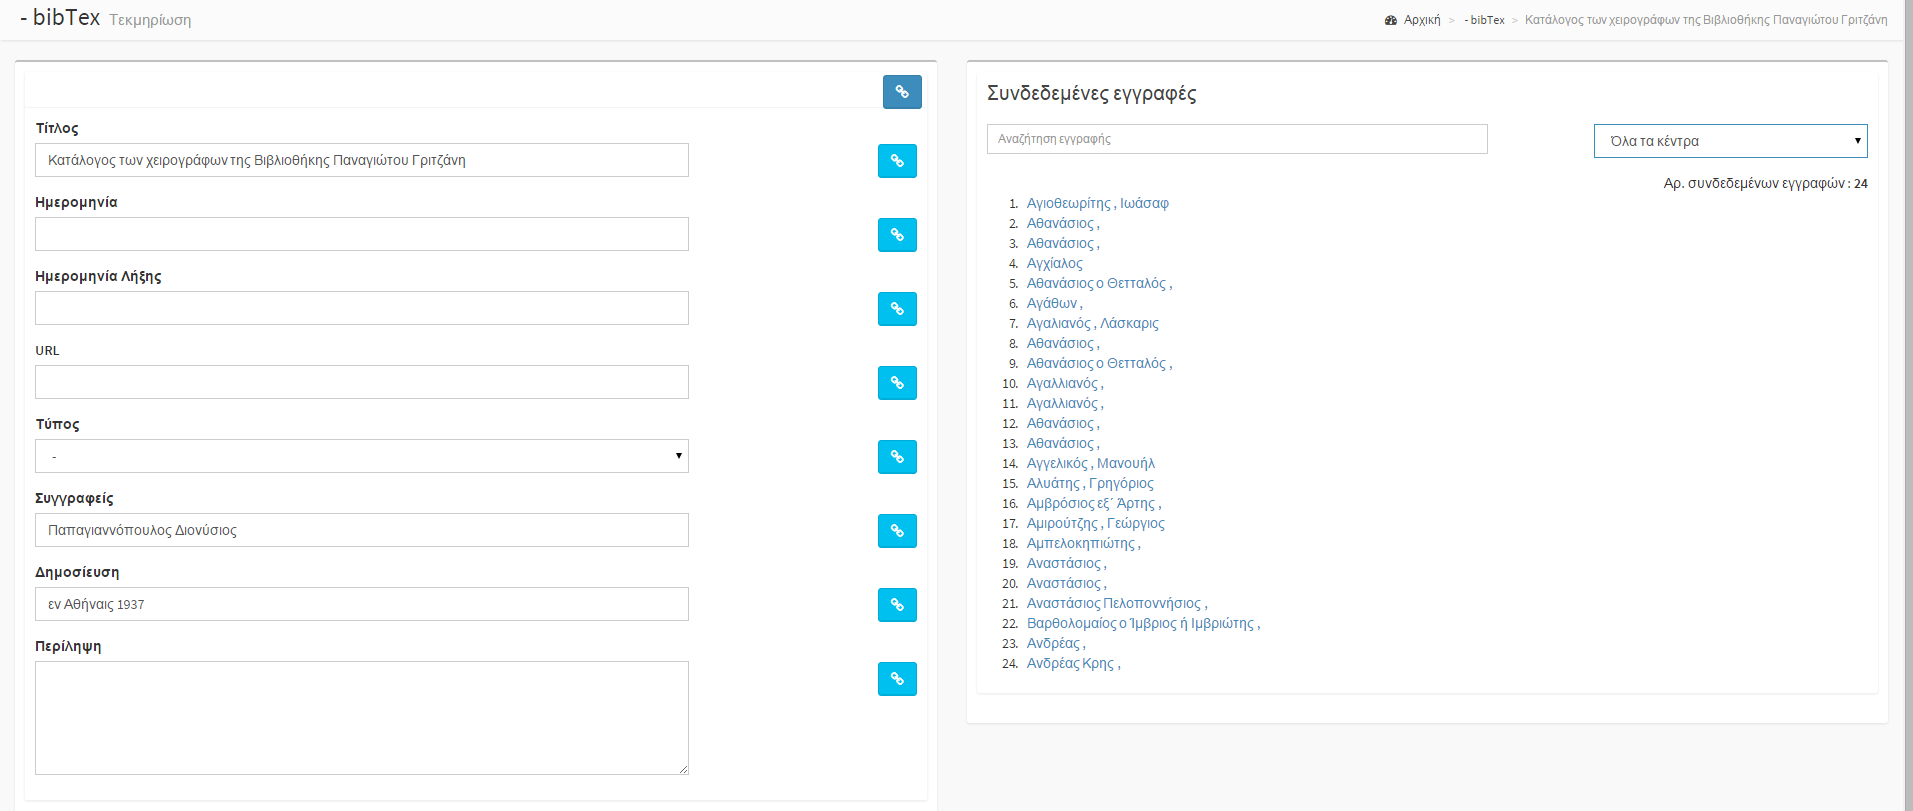
Literature Management
Finally, the administrator can manage the entire literature that has been used through the documentation process. The documentation of the literature is based on bibTeX model and the data used to describe it is the title of the document, the date, URL, type (Books, Book Chapters, Articles in journals, Preprints, Articles in conferences, Technical reports, Presentations, Master theses, Doctoral theses, Files, Newspapers, Letters, Inscriptions), the author, the publishing point as well as a summary of the document. The administrator can edit an item of the literature, add a new record or delete an existing one.

Additionally, the administrator can browse through documents linked with a particular literature, checking simultaneously the Center to which it belongs as well as the metadata of the chosen document.
Display Collections
Another service that the system offers to administrators is the option to show specific units - collections. Therefore, by choosing a Unit to be "Non-Active" it means that the items will not be visible to users of the portal. In this way, all items of a collection can be hidden and visible only to the administrator and / or the documentarist.

Please note that you have to click on "Save" in order to make any changes permanent.
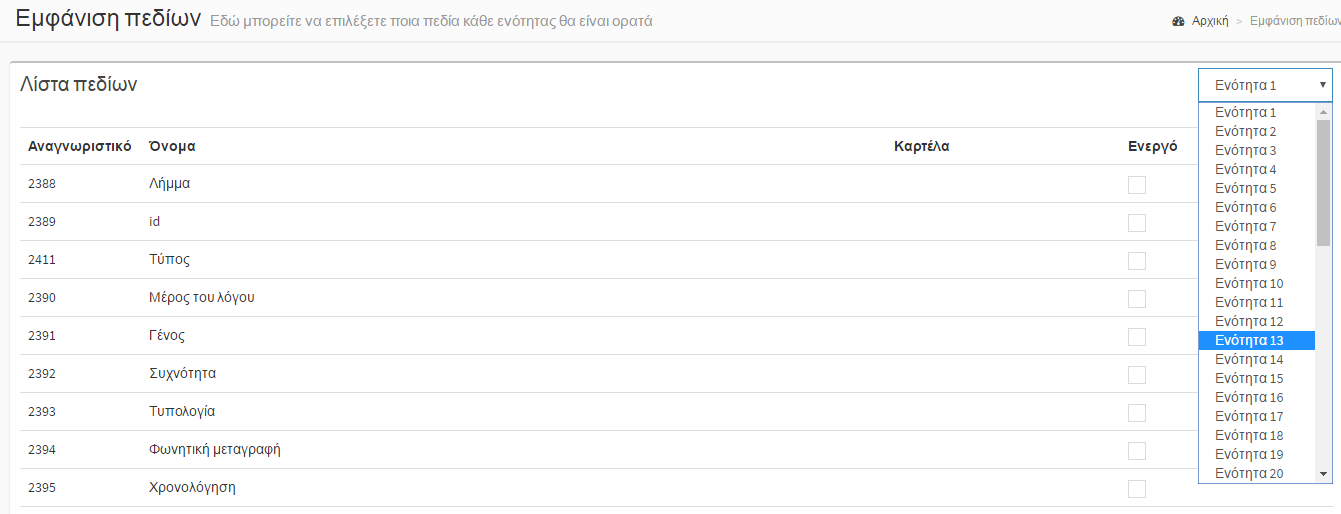
Display Fields
Finally, another service offered by the system to administrators is the option to display fields per metadata schema. The administrator selects a section of interest (dropdown list on the top right of the screen) and the fields of the particular unit appear. Moreover, by selecting "On", the corresponding field will be visible in the digital repository. This service is very useful in the case that a Center wishes to conceal some information for its records.
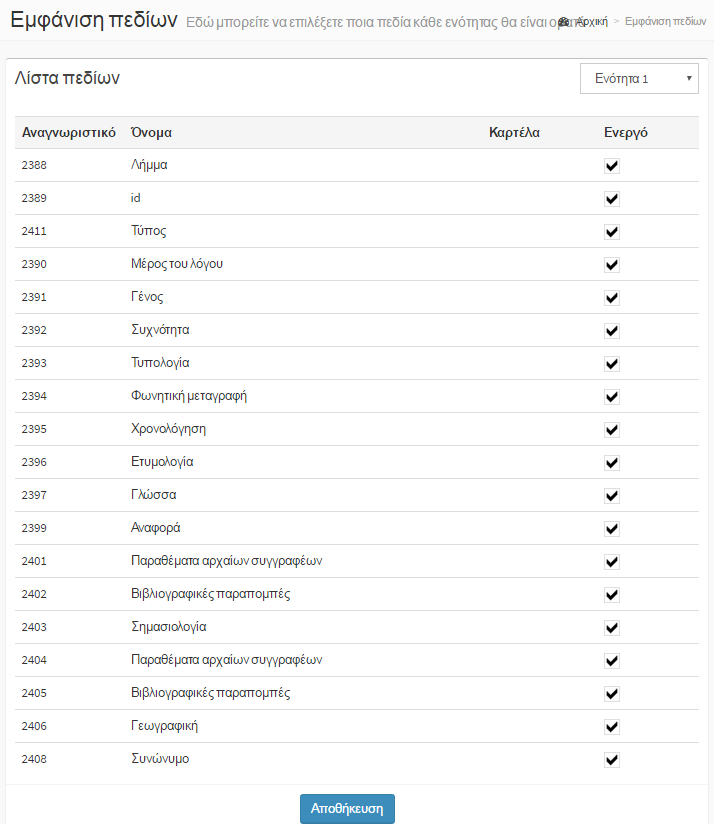
Please note that you have to click on "Save" in order to make any changes permanent.
We can use the dropdown list on the right edge of the screen in order to display only the fields of a given unit.